How to Make a Compact Camera Slider for $5
How to Make a Compact Camera Slider for $5

The article talked about how from parts purchased in the store for a few minutes to assemble a universal slider for shooting video and VR-Object-s, not drilled with no holes.
Prologue
While recording video of the construction of a large rail slider, it took some of the scenes take off with the help of mobile cameras. To this end, I decided to hastily erect the easiest parts of the slider is already acquired for the main project. The design was so simple that I collected it in just 15 minutes. If among my subscribers will videoblogery they hope will appreciate the home-made under appreciated.
Of course, I’ll tell you about the rail and the slider, which also will be built entirely from prefabricated parts. But its structure is much more complicated, and financial costs of three times higher.
The three-minute video shows a slider assembly process and the different ways to use it
That’s what it took to build the three-wheeled slider
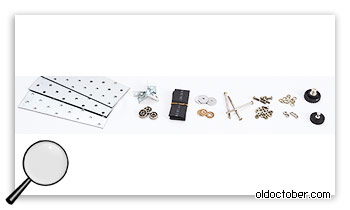
In the picture all the necessary parts and materials for the assembly of three-wheeled slider.
The main parts and assembly units
- Plate mounting 160x50mm – 3pc. – 0,5 х 3 = 1,5$
- Corner furniture 15Х25х25mm – 3pc. – 0,1 х 3 = 0,3$
- Ball suitable size with an outer diameter 10-15mm – 3pc. – 0,25 х 3 = 0,75$
- Heat-shrinkable tubing (diameter depending on the availability of bearings) – 0,5$
- Pair of standard photo cards on 1/4” & 3/8” – 1$
Fasteners (the total value of approximately –1-2$)
- Washers 2mm thickness for alignment mating parts – 3pc.
- Screws M4x30 or longer – for mounting bearings – 3pc.
- Screws M4h30 or longer – for mounting bearings – 6pc.
- Nuts M4 – 12pc.
- Washers М4 – 15pc.
- Washer M4 – 9pc.
———————————–
Total: max 5…6$
Production of video wheel slider

It is hardly necessary to talk about the process of assembling the slider, the more so because there videoillyustratsiya above. I just tell about how "shod" bearings. This can be done by using a hair dryer or a lighter construction. Although lighter use is undesirable, since uneven heating in the flame tube at the thickness may vary around the perimeter of the bearing is stronger than when more evenly heated by hot air.
The fact that the magnitude of detonation (fine vibration) of the slider depends not only on the quality of the surface on which the slider slides, but also on the wheel radial runout. In particular, the wheels on the toys that have been in my possession, did not provide an acceptable level of detonation.
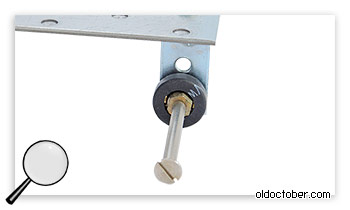
The tube, which I used as a tire, too, is not perfect, and introduces some non-uniformity in the movement of the camera. However, it improves the adhesion of the slider wheel with the supporting surface and protects the latter from damage.
To improve the ride, it is necessary to burden the slider, which creates an additional burden on the supporting surface. In the apartment there exists little perfect surfaces and most likely they will be varnished or polished panels of furniture. "No shoes" bearings can be left on these surfaces traces.
Use the slider for video capture and VR-Object-s
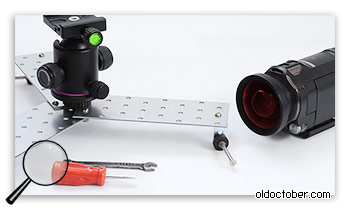
Here’s what happened as a result.
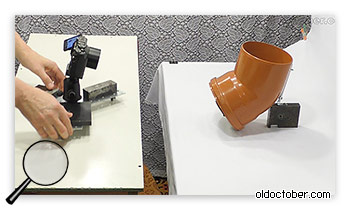
Slider of this design allows the camera to move in a straight line or concentric path which is determined by the angle of rotation of the wheels.

If necessary, remove the three-wheeled slider allows row VR-Object-s (3D models) or a panorama.
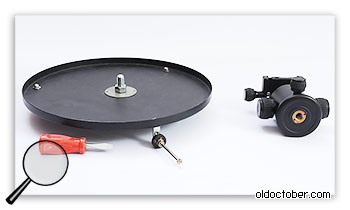
Use this slider it was so comfortable, and the design was so successful that I decided to develop the idea that this slider can be taken on the road. For this I used the platform as a thin-walled steel disk from an old lamp. According to the plan, it will be used as ballast bag of sand.
To enhance the tripod head mounting bolt 3/8 "cemented paving two homemade large diameter washers. Without these goals, knocking slider resulted in a rocking tripod head with the camera.
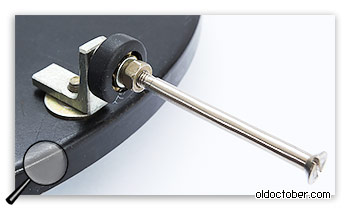
The wheel assembly was replaced by the usual furniture squares on the shorter and thicker, which allowed them to cut thread M4. Now, if the tension screws, performing the role of the rotary axes will be weakened tightening will need only a screwdriver.
Small details
When choosing a path of movement of the slider, it takes quite a precise adjustment of the angle of rotation of wheels. For this to become possible, the screws holding the ball bearings are selected so long.
Not soon, when the trajectory of the movement is rotation about the axis of the slider, it is necessary several times to adjust the angle of rotation of each wheel. The first time it took me five minutes. But when I realized the logic of movement three-wheeled platform, it began to occupy less than a minute. Manage this slider is as easy as to put the car on parking in a bottleneck.
Related topics

How to Make a Camera Slider |

How to make a speaker with your own hands? |

Portable tripod head for half an hour with your own hands |


